Tips To Avoid Common Problems In Laying Laminate Flooring

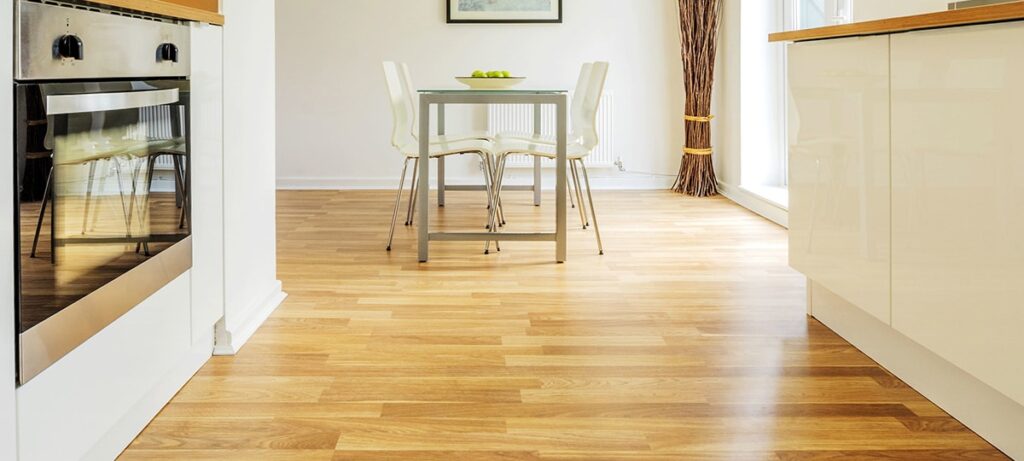
How to Keep Your Laminate Wood Floors Looking Shiny and New

A lot of people wonder how to clean laminate wood floors because it can be somewhat different from cleaning hardwood floors. After all, the two materials aren’t the same thing. But while many people think of laminate as a product that is inferior to wood flooring, that isn’t necessarily true.

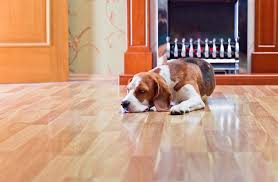
Laminate wood flooring is made from layers of composite wood pressed together and sealed with laminate. Laminate wood looks like solid wood, but it can be a better choice in many ways: It is more durable, less susceptible to scratches (which can be a major issue if you have pets), and more moisture resistant.

Choosing to install laminate wood flooring can also help homeowners save money. It gives you the look of a wood floor at a much lower price point. Laminate is also easy to install yourself. So in addition to the price of materials, you can also save on the cost of labor.

Keeping your laminate wood flooring looking new is easy if you know how to take care of it.

How to clean laminate wood floors

Cleaning your laminate flooring isn’t too difficult if you know the steps to take. Start by sweeping or vacuuming loose debris. Don’t introduce water to the floor until you remove dirt, crumbs, and other debris.

To remove dust and debris, you can use a Swiffer sweeper or a dry microfiber mop, like O-Cedar Dual-Action Microfiber Flip Mop. If you prefer a vacuum, don’t forget to put yours on the bare floor setting—or consider one that adjusts automatically to various types of flooring.

After removing excess debris, sprinkle a little bit of baking soda on the floor. Then mix one gallon of hot water, one cup of vinegar, and a few drops of dish soap in a bucket. (Manufacturers do not recommend using soap products on laminate wood flooring because it can make floors look dull and create excess buildup, but using just a little bit is fine.)

Now you’re ready to mop the laminate wood floors. Gregory recommends a microfiber or chamois mop instead of a sponge mop because “a sponge mop pushes dirty water into grout lines, making them harder to clean later.” Use a scrub brush to remove stuck-on dirt or in more highly trafficked areas of the home.

How to clean laminate wood floors naturally

To clean laminate wood floors naturally, especially when they are really dirty, try using baking soda. Baking soda mixed with water is a mildly abrasive, eco-friendly cleaner, which can be applied with a soft cloth or sponge. Mix a solution of one tablespoon baking soda per one cup of warm water and stir before using.

How often to clean laminate floors

The best way to keep any type of flooring clean is simply to stay on top of it. You should clean floors a minimum of every two weeks. If shoes are allowed indoors or if you have pets, you will need to clean more often. Keeping a floor mat at every entrance to your home can help control the excess dirt.

How to make dull laminate wood floors shine

To keep laminate wood floors looking shiny, it’s best to avoid excess soap-based products. Using too much soap creates buildup and a dulled appearance.

To avoid streaking, just use a commercial product made specifically for laminate wood flooring. If streaks continue to be an issue, it’s best to avoid any soap-based cleaners altogether.

How to remove scuffs and buildup from laminate flooring

To clean laminate wood floors without leaving a film or to remove buildup and scuff marks, the best approach is to go easy. Scuffs on floors and walls are often easier to remove when they’re fresh. “Rather than reaching for harsh chemicals first, try a tennis ball, which can actually remove scuff marks.

Next, escalate to plain water. Start with a damp, soft microfiber cloth and gently wipe the mark to keep the surface safe. Be careful to work only on the mark itself and resist the urge to scour the surrounding area. But whether or not the marks disappear with this first step, wipe with a soft, dry cloth.

Tips for Keeping Your Laminate Floors Beautiful

Laminate flooring has become incredibly popular because it’s beautiful, durable, and fairly inexpensive. Like all floors, however, laminate requires a bit of special cleaning to keep it looking new and shiny. Laminate floors are not hard to keep clean, as long as you know the right way to do it.

Keep your shoes off.

This isn’t so much of a cleaning hack, as just a common sense rule. Put mats on both sides of every door, so that your outside shoes never come in contact with your laminate floor. Even if the bottom of your shoes look pretty clean to you, they will still leave behind dirt and sand.

Instead of floor mats, you could also consider using athletic flooring to limit contact between your shoes and floor mats. Venture Products foam flooring features Microban technology for an added layer of cleanliness protection and can be purchased in tiles for flexibility in any space.

Clean up spills immediately.

Use a dry, soft cloth to quickly wipe up liquid spills, or a slightly damp rag for non-liquids. Dry the spot thoroughly when you’re done, because any moisture, even water, that sits on the floor for an extended period can damage it by wearing down the protective layer.

Clean regularly.

Laminate floors are just like anything else – the more you keep on top of the cleaning, the easier it will be to keep them looking nice. Do a general clean at least once a week, and then a heavier and more thorough clean once a month. For your light cleaning, use either a vacuum with a soft brush attachment or a dusting mop. Make sure you never use a standard broom, because a lot of these have stiff, straw – like bristles that can damage the flooring over time. Also be sure to clean in the direction of the floorboards; this allows you to pick up bits of debris that have fallen in between the grooves of the pieces.

Quickie sponge mops featuring Microban protection works great as a cleaning tool for light, regular cleaning of laminate floors, and as a bonus, features the added benefit of remaining cleaner and fresher for longer.

Use laminate floor cleaner.

You can buy this at home improvement stores, and most large grocery chains. Follow the directions on the bottle, and then clean using a damp mop or cloth. Again, make sure that no moisture is left to sit on the flooring at any time.

Use hot water.

Hot water is considered to be one of the best ways to clean laminate flooring, because it doesn’t leave streaks. Fill a bucket up, plunge in your mop then wring it out until it’s just damp. Then thoroughly mop your floor and dry immediately with a clean cloth.

Use vinegar.

A vinegar and water solution can be a great way to clean laminate floors. Mix together one cup vinegar and one gallon water, then mop and dry as you would using the laminate floor cleaner or hot water.

Remove stains.

Laminate flooring can be stained with all kinds of things, but a list of the most commonly reported ones are blood, gum, soda, wine, crayon and ink marks, scuffs, and polish. Blood can be gotten out with window cleaner, and gum with a plastic knife. The soda, wine, crayon and ink marks can all be removed with a damp cloth. The heel marks and scuffs can simply be erased off with melamine foam (aka a Mr. Clean Magic Eraser.) You can use a bit of nail polish remover for the polish, but always be careful not to use too much since this can actually remove the finishing on the floor along with the stain. Spot test first!

The Event Planner

Tips How Do I Plan An Event?

This is where it starts. Maybe you already have a very specific idea for an event. Or maybe you only know that you’d like to organise one and need a bit of inspiration.

This stage is all about outlining the essentials and answering these key questions:

  • What’s the purpose of my event?

This will give you a clear focus for the coming stages and help you prioritise.

  • Who’s the target audience?

This will affect your communication strategy, which channels you use, your tone of voice, and so on.

  • How will you make it happen?

This is about putting together a plan for the coming steps. Do you have a team or will you do things on your own? What are the must-haves and what’s only nice to have?

You should be coming out of this stage with a solid action plan and a clear idea of what to do next.

NEED INSPIRATION? START A CONVERSATION!

By far the best way to get out of your bubble and find a ton of fresh ideas is to quite literally ask for them. Luckily, the Internet makes this incredibly easy. Search for communities of event organisers. There are plenty of event communities on Facebook and over Twitter Chats (see #EventProfs). Tap into a conversation, or start a new one. It’s easier than it might sound.

Asking a question there is truly as easy as 1, 2, 3:

  • Register an account (it takes minutes, if not seconds)
  • Post your short question. How about: “I’d like to organise an [insert event type]. Could you share some ideas on themes and fun activities I might consider?”
  • Wait for replies to roll in.

You’re almost guaranteed to get at least a few responses, which may lead to further questions and insights. This approach works just as well on Facebook, Twitter, and elsewhere. Give it a try!

PUT PURPOSE TO PAPER

Once you have a clear idea of what your event is about, write down a single sentence that describes its purpose. Something like:

“I’m organising this [specific event] because [reason]” or “My goal with this [specific event] is to [purpose].”

Keep editing until the sentence perfectly captures your true motivation. Ideally, it should be something you’re really passionate about.

Print the sentence out in big, bold letters and a creative font, if you’re feeling fancy. Hang it somewhere where you’ll see it on a daily basis. This will keep you focused and give you the energy to keep going.

Key Elements to Consider When Event Planning

The first thing to consider when planning an event is the date. That’s an anchor that can’t change. You’ll also want to estimate the amount of people expected to speak and attend. These will be two critical elements that will help inform the other aspects of your event planning.

Let’s break down the other components to setting up an event. They are summarized below:

  • Event: First, you must have an event of some sort to plan, of course. That event is going to require a series of responsibilities, revolving around its operations, legal and accounting duties.
  • Venue: The event has to take place somewhere, and that involves logistics management, food and beverages as well as the décor.
  • Marketing: Once you have a place selected, you need to start drawing people to it through a marketing program that can include a website, social campaign, email and print work.
  • Advertising: Hand in glove with the marketing is advertising. That can include radio, TV, newspaper and magazine advertisements.
  • Volunteers: A big event needs a big crew of people to get it off the ground and running smoothly. That means volunteers, which means writing contracts, defining their roles, setting up meetings and determining schedules.
  • Speakers: You must have some keynote speaker or a group of speakers to attract an audience. This will involve contracts, curators to select the talent, a program, bios and rehearsals.
  • Sponsors: All this costs money, and a big event’s life blood is supplied by its sponsors. This will again involve contracts, marketing and logistics.
  • Production: The production is going to involve creating contracts as you work on creating an audio-visual recording of the proceedings, as well as a sound and video broadcast during the event.
  • Stage: The event takes place at a specific site and on that site is a stage on which the event proper will be presented. That usually will incorporate a projector, screen, microphones, internet connection, batteries, cables and more.
  • Attendees: Don’t forget about the people who are coming to the event! You’ll need communications to inform them of event information, payment processes to collect fees, emails to stay in touch, directions, badges and access points.
  • Unfortunately, there are always going to be variables out of your control, such as the weather, delivery delays, technical difficulties and other potential mix-ups. As stated earlier, you can’t change the date of your event, so you’ll want to be as prepared as possible for any risks or issues that may pop up on the day of your event.

Lock in your event budget.

You event depends on the purpose from a visionary perspective, but when it comes to execution, the realities of what you can accomplish come down to your event budget. That number is likely coming from your stakeholders, and there’s not always going to be wiggle room. But that’s not to say you can’t negotiate.

Tips for negotiating a bigger event budget

When it comes to negotiating an event budget, the language stakeholders speak most fluently is data. Unfortunately, if you don’t have previous events under your belt, you probably don’t have any data on hand to make your case.

To get the budget you want, you’re going to have to put a little extra elbow grease in up front. Map out every piece of your event (we’ll get to this in the next section!) that requires spend, and include an educated prediction on how much it’s going to cost to carry it out well. Then comes the most important part. Ask!

While you may not be able to negotiate enough of a boost to close the gap everywhere, you might be able to meet in the middle with a little extra budget for the pieces you care about most.

How to plan an event budget

For a normal event, most of your money is going to go toward the venue rental, food and beverage costs, and A/V needs. But there are plenty more where those came from! Just check out the infographic below that we put together using exclusive survey data collected by Social Tables.

When you’re planning your event budget, make sure that you’re including each of these pieces in your estimates to avoid going over budget.

Pro Tip: Speaking of budgetary concerns, there are hidden costs to look out for, such as last-minute print jobs, or additional audio/visual resources. Estimate anywhere from 3-10% of your total costs and include within your budget to protect you, in case you get any great ideas, or additions that might come after your initial budget.

Establish the event team.

Unless your event is really small, you’re going to need a hand. Well really, you’re going to need a few sets of them. Because while you may have the vision for the final product, you’re going to be stretched a little thin if you’re expected to focus on everything when planning an event. Plus, something like say, digital marketing might not exactly be your forté.

As the visionary, your role is director. It’s up to you to not only assemble your team, but also to make sure that the many wheels are all spinning in the right direction.

Depending on the size of your event, here are a few team members that can help you handle all the moving parts. You’ll also be working with venue representatives and your fair share of suppliers, but this is who you can consider your “internal” team.

Marketer(s)

We’ll touch on everything that goes into a good marketing plan a bit later in this post, but trust us when we say you might want an expert to help you promote your event. Marketing experts can help you put together a cohesive strategy spanning a mix of channels, so you can extend your reach and attract people to your event. (And make the most of your marketing budget while you’re at it!)

Program Administrators

When it comes to the success of your event, content is key — especially if the purpose is to educate or promote. Your program administrator(s) will help you create and carry out a compelling agenda that keeps attendee engagement high for the entirety of your event.

Accountant/Treasurer

Events have to both go by the book and keep everything on the books. For larger events, that can be a little more complicated. A treasurer or accountant will help keep your finances in order and make sure you’re staying within your budget. (If you’re putting on a fundraising event, you’re definitely going to need one!)

Creative

What’s your event logo? What are your colors? How are you going to bring the personality (e.g. brand & voice) to life? All of these are questions for creative experts like graphic designers and copywriters. These team members work closely with your marketing team and program administrators to make sure all communications and collateral embody your brand.

Set the Date and Book Your Venue

You might have a preset date if it is an event that is recurring. However, if it’s up to you, here are a few things you need to pay attention to.

  • Do you have enough time to plan before the day of the event?
  • Skip holidays such as religious or statutory holidays
  • Check whether the schedules of the key participants are free on that day
  • Depending on the venue and the type of event, consider the weather
  • And in case, pick the second-best date

Once you have selected a date, start looking for a venue that suits your needs. Here also you need to consider

  • Whether it’s available on the date and how far in advance you need to book it
  • Their payment, refund and cancellation policies
  • Whether it fits the type of event you are planning
  • Does the venue provide A/V equipment, WiFi?
  • Your seating arrangements and parking needs

Final Preparations

Your event is only days away and there are a few more things you need to do to avoid any setbacks.

  • Check with your caterer and confirm the menu, food presentation and serving details, etc.
  • Make sure the venue is ready to be set up on the date and time you have booked it for
  • Check on all the other equipment you need for the event. Don’t forget to test them to see if they work when you’re finally setting them up.
  • Create an event schedule for you as well as your team

Long Distance Moving Tips To Save You Time And Money

How to Pack for a Long Distance Move

Planning a long distance move? Packing is often the most despised part of moving. It’s time-consuming, tedious and stressful. However, it’s important to stay organized and properly protect your belongings to prevent damage to your goods. The following tips will help you prepare to pack your home for the long distance drive to your new home

Downsize your belongings before moving long distance

Long distance movers craft your estimate based on the volume of your goods and the distance you are traveling. If you have a house full of unnecessary items and useless junk, sort through and purge belongings to keep your moving bill manageable. Not to mention, the less you have, the less time it will take to organize and pack

To lighten your load before tackling your packing, you can:

Have a garage sale or sell stuff online before you move to make extra cash for moving-related expenses

Give furniture, clothing and knick-knacks to friends and family

Donate unwanted items to charity for those who are in need

Use professional supplies for long distance moves

While your belongings can easily be damaged moving locally, long distance moves only increase the risk. Your prized possessions will be traveling on the truck for miles. They may be handled several times and transferred to other trucks or temporary storage along the route. To ensure your goods arrive without a scratch, it’s imperative to only use high-quality, professional moving supplies.

Stay organized when moving long distance

It’s important to manage your time during a move. Packing can quickly become a chaotic affair. Turning a household worth of belongings into stacks of neatly packed and organized boxing is no simple task. Packing takes time, and you will have to continue living in your home as it slowly transforms into a sea of cardboard containers. How will you ever keep track of what you have packed and what you haven’t? What if you need something after it’s taped away in who knows what box?

LONG DISTANCE MOVING TIPS

Preparation is the key to success when it comes to a long distance move as it will help you avoid pitfalls associated with a long distance move. That is why it is a good idea to prepare well before your long distance move. If you are planning a long distance move, this article will help you by giving you long distance moving tips. So, without further ado, here are tips for a long distance move

Look for A Good Moving Company

Hiring the right moving company can help make a long distance move a smooth process. It is good to take your time when looking for a moving company so that you can choose the right one. Keep in mind that all moving companies are not created equal. Request moving estimates from different movers so that you can find one that offers affordable prices.

Create an Inventory List

Make a list of all the items you will be shipping. This will help you get an accurate price estimate from the long distance movers you hire; help you stay organized while packing your belongings and enable you to track your belongings along the journey.  Create the list by going from one room to another, writing down all the things in your house. Once you check an item off at the start of the journey, you will not have to worry about whether it was shipped.

Label Each Box While Packing

If you are packing on your own, consider labeling all your boxes. Label the moving boxes according to the items inside and the room it should go in your new house. Doing so will make unpacking easier and make it easy for your movers to know the room that a certain box should be taken to.

Ensure that Everything Is Packed Properly

It is very important to ensure that all your belongings are packed properly with the correct boxes, wrappings, and tape. This will help you have peace of mind as you can be sure that your items will arrive safely. Look for boxes, newspapers, and tape to ensure that you have all the materials you need to pack your belongings ahead of time. Also, ensure that all your items are well cushioned inside the boxes and packed to the top. The boxes should also be strong, dry, clean, and infestation free. Keep in mind that packing is important to the success of a long distance move. So, ensure that it is done properly.

Long Distance Moving Packing Guide

Moving long distance is a pretty demanding task, but if you take the time to carefully plan your move prior, you can remove a lot of the stress that comes with it. Whether it is your first long distance move or if you are experienced, it never hurts to be prepared. Here is what you should know about moving long distance, and how you can remove a lot of the hassle that comes with packing.

Do Not Sacrifice Quality for Convenience

To ensure protection, do not settle for cheap, used boxes that can tear apart or be damaged during transport. Instead, invest in high-quality, durable ones. The best way to go about this is to treat packing as if you are storing something for long term. If you think like, this, all of your materials will be safe and secure. It may be cheaper to get boxes of inferior quality, but at the same time, you will be sacrificing the security, and the trade-off isn’t worth it.

Remember the 60/40 Rule

Whether or not you are driving a moving truck, having the 60/40 rule in place is very important. The 60/40 rule refers to the weight distribution of all of the boxes that you have on board. This means approximately 60 percent of the weight should be towards the front of the trailer while the remaining 40 percent should be centered at the back. This makes recovery more manageable and reduces the amount of sway during the voyage.

Label!

This seems like a common-sense step, but unfortunately, it is a step that many forget. You will unload many boxes, and it would highly behoove you to know which boxes belong where for your own convenience. Therefore, you should take a marker and write clearly and legibly what is in each box. You can either label each box individually, or if it is more comfortable with you, label one box as a category and have every other corresponding box in one specific area. Do what suit your needs, but please do not forget to at least make some labeling to make unpacking less of a trouble.

Save the Best For The Last

Another good rule of thumb is saving packing the essentials for last. Non-essential items such as books, games, accessories or other objects you don’t use frequently typically go toward the bottom of the box. Objects that have higher importance should be placed at the top to prevent searching heavily for them later.

Best Long-Distance Moving Companies

Moving long distance is always a stressful experience. To help you out, we researched more than two dozen moving companies and reviewed the best of the best for your next move. Keep reading to find out which long-distance movers we recommend.

HIRING MOVING COMPANIES DURING COVID-19

All of our top moving companies are currently open for business. For status updates and to find out what each company is doing in response to the coronavirus

While there is no official moving industry definition for the term “long distance,” most companies use it to refer to moves longer than 100 miles. This can include both in-state and cross-country moves, but it doesn’t include international moves. Any move within this 100-mile range is considered “local.” If a move you thought was long distance is actually a local move, we can still help

Some companies won’t move specialty or bulky items like pianos, hot tubs, and boats, but will handle almost anything to you own. Moving these items costs extra, of course, but it beats coordinating with yet another company just to get your baby grand to your new home.

It has competitive pricing

Considering its strong reputation, variety of services, and years of experience, you might expect to charge premium rates. But we’ve found the company’s prices to be very competitive compared to other long-distance movers.

Your Comprehensive Guide to Long Distance Moving

Moving, whether up the street or around the world, is a major transition for most. With the proper planning and preparation, and of course the services of an experienced, professional moving company, the process can run seamlessly, with a minimum degree of stress.

Long distance moving, especially, brings with it the added tasks of coordinating the transportation of your most prized possessions, either by land, sea or sky, sometimes a combination of all three. From the many valid reasons to go pro to the necessary tasks to be completed leading up to and including the big day to how to go about packing for the long haul, we have put together a comprehensive guide to everything you’ll need to know before you begin.

Once you’ve settled in to your new home, there may be some lingering emotional upheaval left to be dealt with, especially if you are moving on your own.

Don’t Make The Mistake Of Hiring A Divorce Lawyer

Things to Look for in a Divorce Attorney

Choosing the right divorce attorney is difficult. Thousands of lawyers will claim they can help you successfully dissolve your marriage, but how do you know which one is the right fit? In this blog, we will discuss 5 things you should look at before hiring a divorce lawyer.

Credibility: The divorce lawyer you choose should be credible in the eyes of the law, meaning the lawyer should be in good standing with the State Bar Associations. Make sure to do your research on an attorney’s disciplinary record, and verify that he/she is in good standing with the state and federal governments. This search can be accomplished free of charge on most state bar websites.

Focus: Divorce lawyers represent a very specific clientele, and much of their work involves negotiating prior to entering a courtroom. An attorney who has spent the majority of his/her career practicing a different area of law – such as employment or corporate law – may not have the same insight as one who has been devoted to divorce for many years.

Experience: You shouldn’t have to worry about whether or not your lawyer is experienced enough to handle your divorce. As such, it’s important to choose wisely. For example, an attorney who just graduated from law school may not exercise the same level of judgement or strategic planning as one backed by decades of experience. Make sure the lawyer you choose has years of practice and successful case results.

Reviews: Any experienced divorce attorney should have an abundance of reviews – hopefully good ones. Read through the lawyer’s reviews and testimonials. This is an easy way to verify an attorney’s consistency and quality, and it can help put your mind at ease about the decision you ultimately make. Who knows – you might find one detail from a past client that makes the lawyer a perfect fit for your case.

Personality: No, we don’t mean whether or not the attorney is a bubbly person. The legal personality of your divorce attorney needs to match your personality and your case. You don’t want an attorney who treats you like every other divorce client. Rather, you want a professional who will cater to your specific goals and work with you to strategize the best approach for your case. You can get a decent idea of their legal personality through their website, reviews and testimonials.

You can ask a Lawyer

In case you know an attorney, ask him for a recommendation to a really good divorce attorney. He will possibly know someone who devotes a good portion of the law practice to divorce proceedings and relevant issues.

Yellow Pages or Internet

While not a great resource of data, the Yellow Pages as well as internet could be a starting point of getting attorney names. Lawyers who don’t describe separation, divorce, and related aspects like custody or division of property, aren’t seeking cases in these areas and definitely don’t commit a good portion of practice to such areas.

Look out for More Than just One Attorney

In fact, you must interview several good attorneys. Ask every attorney about other ones who handle separation or divorce cases in your area. If you can’t find names, you can also have recommendations from your friends and relatives. You will see that names will show up on a variety of lists of suggestions, the chances are possibly good that the lawyer is doing these types of cases regularly.

By following the above tips you can have a knowledgeable lawyer who will take up your case seriously and provide you the guidance accordingly. Take good time and do not panic, because a single wrong decision can lead you to loads of major problems in your life which you’ll not be able to handle alone.

How Long Does a Divorce Take?

If you’re getting divorced, one of the most common questions is ‘how long does a divorce take’? There are lots of factors that affect how long your divorce takes. Keep reading for a guide to the timescales involved in the divorce process.

What factors affect how long my divorce will take?

Back in 2014, the Office for National Statistics reported that the average time for a divorce to reach ‘decree absolute’ in England and Wales was 33 weeks.

The introduction of regional Divorce Centres in 2015 was designed to speed up the process, but there are still lots of factors that affect how long your divorce will take.

How long it takes you to start the divorce process

One of the biggest delays in formally separating from your spouse happens at the very start of the process, before you’ve even filled in the divorce petition.

Research has found that an overwhelming majority of people try and resolve problems in their relationship – often for months or even years – before they acknowledge that their marriage has irretrievably broken down.

Getting divorced is a big decision to make, and some studies have found that the average person takes more than 2 years thinking about getting divorced before they formally start the process.

Whether you agree

If you agree on your divorce, and you have no assets to divide or children to consider, the divorce process is simpler. In addition, if you have already reached agreement on any financial and childcare matters, then your divorce is likely to go through faster.

How Does Divorce Mediation Work?

Divorce Mediation is a cooperative process whereby a neutral third-party (the Mediator) knowledgeable in the issues of divorce helps the couple through the steps required.

The Mediator will:

  • Help the couple identify all relevant issues that need to be resolved in part by guiding them through a process called Discovery.
  • Educate both spouses on the relevant issues that pertain to their case so that informed decisions can be made by both spouses.
  • Help the spouses create an agreement that is customized to the unique needs of their particular situation and/or the unique needs of their children.
  • Guide negotiations between the spouses on issues of disagreement.
  • Draft a comprehensive Memorandum of Understanding which contains the details of the parties’ agreements.

There are a number of things you need to know before making the decision to choose Lawyer-Driven Divorce:

  • If you are unable or unwilling to communicate with your spouse, a lawyer can be a buffer.
  • If you’ve been defrauded by your spouse, litigation can provide you with relief.
  • If you have an issue that you’re unable to resolve by any other means, litigation may be able to get you a settlement when no other option can.
  • In a Lawyer-Driven Divorce, you will get legal advice.

It can be reassuring for some to have an outside professional available to answer questions and represent them.

Be aware that some lawyers will tell you what to do and some lawyers will act as if they know what’s best for you instead of asking you what you want.

  • Lawyer-Driven Divorce is volatile and can get ugly very quickly.

If one or more of the issues cannot be resolved easily, the process will drag on and head towards litigation. It will also continue to get more hostile and more expensive.

  • Litigation destroys families.

It’s unlikely you’ll be able to effectively co-parent your children with your ex-spouse after undergoing a litigated divorce.

  • Litigation is financially ruinous.

With the average cost ranging from $78,000 to $200,000, you will risk putting yourself in a financial hole you’ll have a hard time climbing out of.

  • A Lawyer-Driven Divorce is extremely stressful.

The back and forth. The arguing. The motions. The waiting around. The lack of control. The mounting legal bills…

  • Divorce litigation is a matter of public record.

If your case goes to trial, anyone can sit in the courtroom and watch what’s going on. Your friends. Your family. Your neighbors. Anyone.

  • Divorce laws aren’t as clear as you might expect.

There is no magic rule book that points out who gets what in a divorce. And in reality, the issues that need to be resolved in a divorce have less to do with laws and more to do with money and negotiation.

  • The outcome of your case may be decided by the competency of your attorney.

Some lawyers use strategies to confuse, manipulate or outsmart their opposition. Lawyers each have their own personality and style. Some can be hostile and deceptive; others can be irrational and unreasonable.

If you hire an incompetent or unreasonable lawyer, you may find yourself with an unfavorable outcome.

And if your case goes to trial and the judge makes their decision, you might find that you are not satisfied with the ruling.

Posted inLegal

Courses And Training Opportunities For Electrical Home Inspections Schools

What is Covered in an Electrical Home Inspection?

During your electrical system inspections, we will check for over current protections, grounding, and the presence of any aluminum wiring (a serious fire hazard and banned for many years in most states) during our electrical system inspections in your home for you. We remove the face of the electrical box if it is safe to do so

We also check a representative number of switches and outlets in the house and note the adequacy of smoke detectors. Some possible defects include poor clearance over roofs, driveways and walkways, poor connections, branches and vines, wiring and equipment damage, unsafe proximity to windows, balconies, decks, swimming pools and doors, and breaker panels (which indicate which circuits feed which rooms).

When electricity enters a home, the breaker panel gives the home inspector information about the system’s age, installation and adequacy for the home. Wiring leaves the box and routes its way throughout the home, feeding each room with one or more circuits that operate lighting, outlets, built-in systems such as HVAC and other fixtures. Some potential defects of the breaker panel may be poor connections, uncovered openings, unsafe or outdated breaker box, mislabeled or unlabeled breakers, and overheating evidence. The inspector will use some type of electrical tester to detect the different issues with your electrical system.

A home inspector also needs to determine the age of the wiring inside the home’s walls. Sometimes it is impossible to tell. There may potentially be physical damage, or in other cases, loose wire connections, abandoned wires, faulty outlets and switches, open wire splices, no ground wires or wrong wire gauge and other issues.

Many times, a home inspector will find double taps on breakers and the neutral bar, two wires under one breaker, and a neutral and ground under one screw. Another common issue is non manufacturer breakers in panels

Building Permits

PERMITS

In an effort to continue providing efficient processing of permits, please submit applications online using our ePermits system. The online system is available for most permits, including permits requiring plan review. Digital plans can be uploaded during the online application process.

Inspectors will continue to take precautionary measures by dressing in personal protective equipment. Both inspectors and person(s) on site are expected to continue practicing social distancing.

Permits and Inspections Division ensures that public safety and health standards related to building construction and land use are maintained for the general welfare of the community. This provides safety for everyone through proper construction methods and maintains neighborhood livability and property values.

will be adopting a digital plan review process for Commercial Permits. Required to be submitted with your application will be a digital copy of your plans along with two paper plans (please see the requirement checklist below for full details). Paper plans will be phased out over the course of the year. Permits can be applied for online with digital plans attached and plans dropped off or mailed in or all required documents submitted in person.

Building Inspections

Please note the following information as it relates to Building Inspections:

Inspections which require staff to pass through or enter an occupied space are suspended. These inspections will only be completed by photo or through our Virtual Inspection Process (VIP), using smartphone technology such as Skype or Facetime. No physical inspection will be conducted by staff except for life safety/structural issues.

Inspections of unoccupied structures or elements are still occurring but staff are encouraged to complete through our VIP. When a physical inspection is necessary they are to be performed unassisted. Staff must also practice social distancing and wearing PPE’s as referenced above.

The Office of Inspections is responsible for conducting inspections of building projects to ensure their compliance with the adopted county building codes. Our certified inspectors perform all building, mechanical, plumbing and site inspections.

Electrical Inspections

All electrical inspections are regulated by the State of Delaware

Inspections Section strives to provide accurate and consistent applications of the International Codes for our customers. However, from time to time an occasion will arise where we need input from the International Code Council (ICC) regarding a specific code section. In these cases, a request is sent to the ICC and a Staff Code Interpretation is provided in return. These impartial third-party decisions are receive from the ICC to assist jurisdictions in applying the code fairly and accurately.

Electrical Inspector Scheme

The inspection, testing and certification of electrical installations and equipment underpin electrical safety in all situations, at home and in the workplace. While government approved schemes focus on new installation work, much of the inspection and testing work is actually carried out to ensure ongoing safety

The scheme membership is tailored to the work you or your operatives do. The Electrical Inspector Scheme covers the production of Electrical Installation Condition Reports (EICR) in domestic, commercial and industrial buildings.

Legal Requirements – Employers, Duty holders and Landlords have obligations to ensure the electrical safety of systems and equipment inall types of installations, i.e Commercial, Industrial and domestic. These are stated in the Electricity at Work Regulations and Landlord and Tenant Act and other associated legislation. Competence is required by this legislation and the use of an independent registered inspector is often the most suitable way of ensuring compliance.

Qualifications – For Electrical Inspector scheme work you or your employees must have qualifications (or equivalent) covering core electrical installation, wiring regulations and periodic inspection and testing. Individuals who already meet these requirements via CPS, EAS or TPC scheme membership would be eligible to add EICR work.

Inspection – For Electrical Inspector scheme work you or your employees will have to have 3 reports evaluated for each building type in your scope (domestic, commercial, industrial) during your annual assessment visit.

HOW EIS RELATES TO CPS, EAS AND TPC

If you are registered under any of the schemes demonstrating electrical competence (CPS Full Scope Electrical, EAS or TPC) you will already meet most of the criteria for the Electrical Inspector Scheme. For Electrical Inspector work you or your opertative will need to verify that your qualifications are at a level covering periodic inspection and testing not just verification work

How To Inspect Your Own House, Part: Electrical

I wrote a blog post about homeowner maintenance inspections, wherein I promoted the virtues of having a home inspector conduct maintenance inspections on existing homes every five years or so.  I promised to follow up with a post on how homeowners could conduct their own home inspections, but I don’t know what I was thinking when I said I’d follow up with a “post”.

I should have said I’d follow up with my longest “series” of posts ever.  For the first part of this series, I covered the inspection of the exterior.  I took a little break in this series because I had a few other things to discuss that were somewhat time sensitive, but I’m back on the homeowner inspection series again.

Today I’m going to cover electrical.  There is a ridiculous amount of stuff that could be covered with this topic, and a lot of it takes a lot of explaining.  I’m going to cover the stuff that takes the least amount of explaining and makes the biggest impact on safety.

Overhead Wires

If your home has overhead wires bringing in power, check to make sure there are no tree branches rubbing on the wires.  It’s the homeowner’s responsibility to maintain / trim trees on the property that may interfere with the overhead wires coming from the utility pole to the house.

Also, take a close look at the connection point between the overhead wires right before they disappear into the mast head.  One wire is the neutral wire; it’s normal for this wire to be exposed, but the other two wires shouldn’t have any exposed contacts.  If there are, these are serious shock / electrocution hazards that should be repaired by the utility company.  The photo below gives an example of an exposed ferrule at one of the hot wires.  Touch that thing with an aluminum ladder, roof rake, or something similar, and it’ll be lights out for you.

Home Inspection Professional Associations And Designations

Checklist: Pre-Purchase Inspections and Searches For Home Buyers

checklist of house inspections and searches you need to get when buying a house, unit, or apartment. Pest inspection, building inspection, title searches, and more.

From pest inspections to title searches, there’s a lot that needs to happen between viewing a property in person and settlement day. If any of the searches or inspections reveals major problems, it is usually possible to withdraw your offer before settlement of the purchase contract.

Personal Inspection

Having made your shortlist from real estate websites or storefronts, you should arrange to do an in person pre-purchase inspection all of the properties you’re interested in. The real estate agent or seller will let you into the property and point out any selling features of the property.

If possible, always take someone else along with you when you go to inspect properties. Having that second pair of eyes can help you pick up defects – and benefits – you might otherwise miss. checklist for buying a house and checklist for buying a unit both list things you need to check or at least ask about during your personal inspection, such as the following:

Is the property close to facilities that are important to you? (e.g. schools, public transport, public parks)

Are any of the bedrooms west-facing so that they get very hot during the day?

Are the building and roof structurally sound? Does the gutter have any cracks that would let rainwater damage the building walls?

Is the neighbourhood noisy?

Does the property get enough natural light?

What’s the water pressure like? Any leaking pipes under the kitchen sink or in the bathroom?

Is there any sign of termite activity, mould on the walls and ceilings, or rotting floorboards hidden under carpets or rugs?

Do all of the hinges on doors, windows, and cupboards work?

Try the light switches – does the electricity seem to work okay or do the lights flicker?

What does it smell like?

Did you see any construction going up nearby?

Are there enough carparks?

Is it in a flood zone?

Will the council rates, utilities (water and gas), home insurance, and car insurance be more or less than you are paying at your current place?

What are the apartment strata ownership costs (body corporate fees and levies)?

What are the current vacancy rates? (important if you’re buying as an investment)

There are some rare cases when you’ll be forced to move somewhere without seeing the property first, such as if you’re moving interstate or overseas for work. But it’s always a better idea to rent rather than buying if you have to move somewhere sight unseen – if it’s a mistake, it’s less permanent. If you have to buy somewhere without seeing it, a buyer’s agent can stop you from making an error based on beautiful real estate photos.

Home Inspection Checklist

This inspection checklist provides a way to make notes about the condition of important features in your home, room-by-room. Before doing a walk-through, see some of the resources listed below to learn about what types of things to look for as you are doing your inspection.

Important: This checklist is for personal use only. It should not be used in place of an official home inspection. This list may not be comprehensive. Contact a qualified ASHI certified home inspector for an official inspection.

Pre-Purchase Building Inspection

The naked eye alone cannot tell you all the faults in a property. Every buyer should enlist a qualified building inspector to do a pre-purchase building inspection of aspects including the following:

Plumbing is intact

Doors and windows can open and shut

Loose or damaged roofing, gutters, and downpipes

In-roof and under-floor crawl spaces are structurally sound

Fences and retaining walls are structurally sound

Garages, carports, and garden sheds are structurally sound

Rising damp

Surface water drainage around property and driveways

Asbestos

Termites

A pre-purchase building inspection can be done by a licensed builder, a surveyor, or an architect. It is generally recommended that you find a third-party professional to do the inspection, rather than one suggested by the seller.

Almost every house has some imperfections, and the vast majority will be fixable. If you know about these defects before you buy, you can negotiate a lower price and save the money to prepare for repair costs down the track.

The Basics of Home Inspection

When buying a home, one part of the process is to have a home inspector check it out for any problems. home inspectors evaluate the systems in your home, including plumbing, the attic, basement, roof, and more. They provide a report so that you know what you’re buying and what condition it’s in.

While it’s not legally required, it’s important that you hire a home inspector. Although you will be responsible for the cost, you do not want to rely on a seller to provide you with information about the home. Even if he or she is honest, the inspector may find things the seller does not know.

What to Expect

an inspection is not an appraisal and does not guarantee that the home complies with building codes. They also warn that no home inspection should be considered a “technically exhaustive” evaluation.

Here are just some of the things a home inspector will normally check. (Note: this is not a comprehensive list.)

Grounds – Including driveway, porches, steps, fences, retaining walls.

Exterior – Basement/crawlspace/slabs, finish, siding, chimney, gutters, windows.

Foundation – Joists, vents, type of insulation, HVAC, wiring.

Attic – Access, trusts, ventilation, HVAC, wiring, insulation.

Electrical – Outlets, fixtures, GFCIs, grounding.

Plumbing – Lines, leaks, flow, drains, disposal.

Interior – Walls, doors, floors, fireplace, smoke detectors, carbon monoxide detectors.

Bathrooms – All plumbing and electrical, drain operations, vents.

Kitchens – Appliances, anti-tip devices, ventilation, cabinets.

WHAT TO ASK A HOME INSPECTOR

Also, it’s important to know that home inspectors are not required to report on wood-destroying insects (termites), environmental contamination, pools, spas, detached structures, or cosmetic issues. Some will cover those areas, however, so it’s important to ask about those items if necessary

The Home Inspection

A satisfactory home inspection is a major component of purchasing a home. The buyer selects a licensed home inspector and pays for the inspection. The home inspection will be an additional cost of a few hundred dollars, but can give you the confidence that you know as much as possible about the property.

Do I need a home inspection?

Buyers should rely on an accurate home inspection to maximize their knowledge of the property in order to make intelligent decisions before entering a final agreement to purchase the property.

A home inspection, conducted by a licensed third party, is an objective visual examination of the physical structure and systems of a home, from roof to foundation. It is the equivalent of a physical from your doctor, and gives you a true understanding of a home’s potential problems. An inspector can also recommend ways to address or more closely examine potential issues.

What is involved in a home inspection?

A standard home inspection summarizes findings from a visual inspection of the home’s

Heating system

Central air conditioning system (temperature permitting)

Plumbing

Electrical systems

Roof, attic, and visible insulation

Walls

Ceilings

Floors

Windows and doors

Foundation, basement, and the visible structures of the home

A good inspector will provide you with a written report immediately following the inspection. A failed inspection allows you to withdraw from the transaction (provided this contingency is in your Offer to Purchase Real Estate or to renegotiate the sales price.

Guidelines For A Home Inspection

Like a homebuyer, there are lots of steps that occur from the purchase of a house. Not the least of which is creating a home inspection completed. By employing a qualified home inspector, a house might be thoroughly evaluated with a neutral alternative party and any issues could be uncovered before buying and moving into your home.

Attend the house inspection. While a real estate agent are prepared for the house inspection, it usually is a good idea for that buyer to wait the inspection too. By doing this, you will get all the straight from the house inspector and in addition no matter what issues within person. An average home inspection only requires a few hours of time which enable it to mean the real difference between building a costly mistake and avoiding it

No follow-up. If issues are normally found or perhaps an inspector makes recommendations of repairs that might be completed in the future, then an estimate for repairs ought to be built to find out the cost involved. Some inspectors will make an indicator for the follow-up from another vendor to check out a unique issue. In this case, make sure that the opinion of some other professional is sought regardless of whether it delays the timeline to shut.

Don’t merely take the inspector’s word. It isn’t really wrong to get another professional browse the home. For those who have suspicions about the condition of the roof or HVAC unit, contact a professional in every field to test everything out. A termite inspection can also be another good idea regardless if the bank requires it you aren’t. The very last thing for you to do is buy a home to see immediately it takes a pricey repair that could have been prevented with thoroughly inspecting the property prior to purchase.

Regardless of whether it’s a new home, your house inspection should be completed. This method will verify that everything has been designed to code no corners were decline in the dwelling process. Older homes may necessitate additional tests. Homes which can be over 3 decades old may have additional problems that may not be seen in a visible home inspection.

The Heightens Surveillance On Tax Preparation

Tax Prep Checklist – What Your Accountant Needs to Prepare Your Taxes

If you’re part of the roughly 60% of Americans who pay someone else to prepare their tax return, then there’s a good chance that you’ve had to make more than one visit to the preparer’s office because you forgot something. Since preparing taxes happens only once a year, we’ve put together a little refresher to help you gather all the documents you need beforehand.

Identification

Even if you’ll be returning to the same tax preparer you’ve used for years, it’s always wise to bring along some identification. This is especially important if you plan on requesting a refund anticipation loan (rapid refund), since preparers are required to keep a copy of your current ID on file.

It’s always a good idea to bring Social Security cards for yourself, your spouse and any dependents rather than trying to recite them from memory. A mistake of even a single digit will result in your return being rejected, and that can mean a delay in getting any refund you are entitled to.

Proof of Income

Your income tax return must reflect all of your income – not just most of it or what you remember. This is important because any income that doesn’t make it onto your return can result in penalties and interest for under-reported and under-paid taxes.

For tax purposes, income is any money you receive from any source that is not a gift. This includes social security, retirement benefits, sale of real estate, investments (including dividends), bank interest, alimony, gambling and, of course, wages. Income from your job, or jobs, will be reflected on W-2s. All other sources of income, such as money earned as an independent contractor, will be reported on a 1099 of one form or another.

Some often overlooked sources of income that you will need to have documentation for are:

  • Foreign earned income
  • Rental income
  • Income from hobbies
  • Unemployment
  • Prizes
  • Debt that has been forgiven

Proof of Expenses

Many people don’t itemize their returns and therefore fail to bring proof of expenses with them to the tax preparer. This is a bad practice, as any deductible expenses that you have which are greater than the standard deduction will reduce the amount of taxes you owe or increase the size of your refund. For tax year 2019 (what you’ll file in early 2020), the standard deduction is $12,200 for individuals, $12,400 for married couples filing jointly and $18,350 for those filing as head of household. Tax-deductible expenses that can lower your tax burden include:

  • Self-employment expenses, such as mileage and equipment
  • Un-reimbursed employee business expenses, such as travel and client meals
  • Certain education expenses related to your job
  • Medical expenses (over 10% of your adjusted gross income)
  • Charitable contributions, including non-cash donations, such as clothes or food
  • Mortgage interest
  • IRA contributions
  • Union dues
  • The cost of last year’s tax preparation

Proof of Losses

Losses occur as a result of things like natural disasters, fire, theft and other unexpected catastrophes. Bring along proof of the event in the form of police or fire reports, insurance claims and other official documentation that spells out what occurred and when. If you’ve received partial payment in the form of insurance or federal or state disaster relief, bring that along as well.

Blank Checks

There are two reasons you should bring blank checks along to your tax preparation appointment: if you owe, it’s a good idea to write the check right there and mail your payment in when you leave the office, and if you’ll be receiving a refund and would like it directly deposited into your bank account, you have the information on hand.

Get all the tax forms you’ll need

As with deadlines, the specific tax forms you’ll need depend a lot on the particular business entity you’ve chosen to use for your small business.

Each type of business needs slightly different forms, but the general idea is the same: Returns typically include a summary page that offers a high-level look at your tax picture, with supporting schedules and attachments to dig into more detail and provide more granular information.

Having the right forms is crucial to meet the rules.

Tips on the most common tax forms you’ll need:

  • Sole proprietorships use Form 1040, especially Schedule C, to report business income and expenses.
  • C corporations file their taxes on Form 1120.
  • S corporations use a special Form 1120-S from the IRS.
  • Partnerships must complete Form 1065 and then provide individual partner information on Schedule K-1.

Gather Your Financial Records

While providing the right personal information is essential if you want your tax return to be properly processed, you will also need a substantial amount of financial records on hand to make sure that you correctly fill out the necessary tax forms.

The most common financial records that you will need to have include:

  • Income statement: This is a profit and loss statement that displays how much income your business lost or generated during the year by subtracting your expenses and the cost of goods from overall revenues for the year
  • Balance sheet: This is a statement of your company’s financial position that lists the owner’s equity as well as any assets and liabilities that the company has
  • Bank and credit card statements: These are monthly documents that state what the balance was in your company’s bank account and credit card for each month of the year
  • Payroll documents: This is an extensive breakdown of the wages and deductions that your employees were allotted for each payment period
  • Previous year’s business tax return: When you’re filing your company’s taxes for 2020, you will need to obtain the tax return from last year, which is effectively the 2018 return
  • Partnership agreements: This is a simple contract between each partner in a business partnership, which is used to identify the terms and conditions of the partnership
  • Accounting documents: These are original records of all financial transactions that your business had during the year, which could be anything from receipts and invoices to orders and credit memos
  • Asset purchase details: If your business purchased assets from another company during the year, it’s important that you provide details about this agreement
  • Depreciation schedules: When you own a company, it’s possible to deduct some of the property and pieces of equipment that are necessary for making income, which is why you need to determine the depreciation schedules of these assets for your taxes

Get documentation for business expenses

Many lucrative tax breaks are available to small businesses, but you typically have to be able to prove that you qualify for them. Sometimes, you’ll have to submit that evidence to tax agencies in order to claim your tax benefit, while in other cases, it’s sufficient for you to have it available.

Often, receipts are sufficient to document expenses. But with some deductions, more extensive proof is required. Be sure to get the right information for the right deduction, and doing it correctly up front is much more efficient than having to get corrected information later down the road.

Tips on common small business expenses:

  • Many expenses, such as insurance, overhead costs, supplies, utilities, and professional fees, don’t involve a lot of extra documentation.
  • With some tax breaks, though, a lot more information is needed. Those include the home office deduction, transportation, meals and entertainment, and small business health insurance expenses.
  • Checking with a tax professional occasionally to see if you’re capitalizing on all available tax breaks can be extremely lucrative.

Look for Tax Deductions and Credits

Tax deductions and credits are highly beneficial when filing your taxes because they allow you to lessen the amount of money that you owe or increase your tax refund. Keep in mind that deductions and credits function slightly differently. For instance, deductions lower the amount of business income that can be taxed. On the other hand, credits directly lower the amount of money that you owe.

A few common tax deductions for small businesses include:

  • Work opportunity
  • Small employer health insurance
  • Disabled access

There are also numerous expenses that you can claim deductions for, which include:

  • Charitable contributions that your company has made
  • Travel expenses
  • Home office expenses
  • Business use of a car

Choosing A Pediatric Specialty Specific

Why Choose a Pediatric Dentist?

What Is a Pediatric Dentist?

A pediatric dentist is a dental care professional that offers all the same services as a dentist for adults. These include checkups, cleanings, fillings, crowns, and sealants. Pediatric dentists are responsible for the prevention, detection, and treatment of any oral issues.

The training for a pediatric dentist is similar to that of a general dentist. First, they have to get a bachelor’s degree that fulfills the requirements of the dental school they wish to go to. Then, they must get a Doctor of Dental Surgery or Doctor of Dental Medicine, which takes at least four years of schooling.

After schooling, pediatric dentists have to do two years of residency to gain experience in their field. Once residency is complete, they can take exams to get licensed.

What Are the Benefits of Going to One?

Adults and children alike have a common fear of going to the dentist’s office. The strange smells and scary drill noises, plus painful experiences in the past can induce enough anxiety that people put off vital visits.

Forming a good association with the dentist at a young age is crucial in your children’s development. This is why it’s important for them to see a dentist that specializes in taking care of patients like them.

Here are a few benefits your kids can get from going to a pediatric dentist.

A Welcoming Environment

You may have noticed that most dental offices look quite sterile and medical. Your children may be intimidated by such an environment and this can cause further distress and bad memories tied to the dentist.

In a pediatric dental office, the practice caters specifically to young children, which means they’ll have bright and cheery walls painted with cute designs, such as animals and fantasy worlds. This will help your children feel comfortable in that setting and calm any phobias.

Staff Are Trained to Deal with Children

How many times have you been to your dental appointment and was coldly brushed off by either the receptionist, nurses, or the dentist themselves? As an adult, you’re better equipped emotionally to let it slide, and you don’t let that put you off from going to the dentist again.

But children may feel scared in an unfamiliar place, and when the people there treat them unkindly, it can compound on the fear of dental offices. In a pediatric dentist’s practice, all of the staff members are properly trained to deal with children to ease any fears or discomfort.

Even if your kids become hysterical, the staff will remain calm and use effective soothing techniques to calm them down. This can be especially helpful if your children have special needs; pediatric dental staff should be trained in using the right methods to soothe issues such as ADHD or autism.

Pediatric Dentists Specialize in Caring for Primary Teeth

You may think that primary teeth (or baby teeth) don’t need any looking after; they’ll fall out and adult teeth will replace them, after all. But the fact is, not all primary teeth fall out!

If there are any problems with your children’s primary teeth, their pediatric dentist will know how to deal with them without causing further damage. Baby teeth have a different composition to adult teeth (thinner enamel), so regular dentists may not be able to address issues as effectively as a pediatric one.

Pediatric Dentists Make Oral Care Fun

No one finds brushing and flossing exciting, including kids. But pediatric dentists can teach your children good habits by incorporating fun lessons.

Children tend to listen to authoritative figures rather than their own parents, so it’s vital you choose a pediatric dentist that you feel they’ll look up to. If you pick a dentist that’s a good fit for your family, you’ll be surprised at just how eager your kids are willing to go through daily routines for oral hygiene.

They Can Minimize Pain and Fear

It’s almost inevitable that your kids will get cavities at some point. When this time comes, you want a caring, patient dentist to handle the treatment. Your children may be squeamish and cause the filling procedure to start and stop constantly; you don’t want the dentist to chastise them for doing so.

A pediatric dentist will be experienced in handling these treatments for children and will be kind and reassuring throughout the whole thing. Your children’s first memories around cavity fillings can contribute to their overall feelings about dental practices; by choosing a pediatric dentist, you can ensure they have positive experiences all around.

What does a pediatric dentist do?

Pediatric dentistry offices are colorful, fun, and child-friendly.  Dental phobias are often rooted in childhood, so it is essential that the child feel comfortable, safe, and trusting of the dentist from the outset.

The pediatric dentist focuses on several different forms of oral care:

Prevention

Tooth decay is the most prevalent childhood ailment.  Fortunately, it is almost completely preventable.  Aside from providing advice and guidance relating to home care, the pediatric dentist can apply sealants and fluoride treatments to protect tooth enamel and minimize the risk of cavities.

Early detection

Examinations, X-rays, and computer modeling allow the pediatric dentist to predict future oral problems.  Examples include malocclusion (bad bite), attrition due to grinding (bruxism), and jaw irregularities. In some cases, optimal outcomes are best achieved by starting treatment early.

Treatment

Pediatric dentists offer a wide range of treatments.  Aside from preventative treatments (fluoride and sealant applications), the pediatric dentist also performs pulp therapy and treats oral trauma.  If primary teeth are lost too soon, space maintainers may be provided to ensure the teeth do not become misaligned.

Why See a Pediatric Dentist?

Pediatric dentists (or pedodontists) are qualified to meet the dental needs of infants, toddlers, school-age children, and adolescents.  Pediatric dentists are required to undertake an additional two or three years of child-specific training after fulfilling dental school requirements.

In addition to dental training, pediatric dentists specifically study child psychology.  This enables them to communicate with children in an effective, gentle, and non-threatening manner.

The American Academy of Pediatric Dentistry (AAPD) recommends that children see a pediatric dentist before the age of one (or approximately six months after the emergence of the first primary tooth).  Though this might seem early, biannual preventative dental appointments are imperative for excellent oral health.

Parents should take children to see a pediatric dentist for the following reasons:

  • To ask questions about new or ongoing issues.
  • To discover how to begin a “no tears” oral care program in the home.
  • To find out how to implement oral injury prevention strategies in the home.
  • To find out whether the child is at risk for developing caries (cavities).
  • To receive information about extinguishing unwanted oral habits (e.g., finger-sucking, etc.).
  • To receive preventative treatments (fluorides and sealants).
  • To receive reports about how the child’s teeth and jaws are growing and developing.

Tips For Your Child’s First Dentist Visit

Every child has unique needs, but all of them deserve to be treated with care, compassion, and empathy. At Dentistry for Children, P.C., we’re committed to creating the most positive pediatric dentist experience possible for each patient we see. Some children may exhibit anxiety or fear when it comes to visiting the dentist, but rest assured that our entire team is focused on helping your children overcome their anxieties. Below, you’ll find a few helpful tips for planning an awesome visit.

Be positive. Don’t let your child know of any anxiety you may have about dental visits.

Set an example at home by practicing good dental habits. If your child is no longer an infant, it’s helpful if you encourage him or her to look forward to their first visit. Reading books together, accompanying an older sibling, or simply talking about the fun one has at the dental office can go a long way toward allaying any anxiety your child may have.

Don’t over-explain. Leave the talking to us! We use children’s dental words and have special, non-scary ways of explaining treatment to your child. Don’t purposely mislead your child. At the same time, don’t give your child more information than he or she is able to understand. By all means, avoid using words like “hurt,” “drill,” “x-rays,” or “shot.” Avoid comments that may appear to be reassuring, such as, “Don’t worry, the doctor won’t hurt you.” Such comments actually make your child more anxious rather than less. After all, your child knows that when anticipated experiences are really fun, you never say that.

Allow your child to go into the treatment area alone. Many studies, along with decades of evidence, have shown that most children over the age of three react more positively when permitted to experience the dental visit on their own. If we feel that your child may benefit from coming into our treatment area alone, we will discuss this as an option before proceeding. We welcome parents that wish to accompany their children into our treatment area, as in many cases, this can help with your child’s anxiety. We may, however, ask that you be a “silent partner” and sit by quietly. This gives our dentists the opportunity to establish communication and trust directly with your child.

Understanding the Need for Pediatric Dentistry

Children differ vastly from adults in many ways. From the size of their bodies to their rapidly growing teeth, they require specialized care from practitioners who are specially trained to respond to their diverse needs. This is why pediatric dentists receive extensive, additional training specifically focused on those unique dental care requirements of babies, children and teens. Pediatric dentists have become an essential addition to a child’s healthcare team to build a strong, healthy foundation for their teeth and overall health.

Babies, children, and teens all require a specifically trained dental eye. From a baby’s teething process within the first year of life to the appearance of the final molars in their teen years, pediatric dentists are there to help both children and parents navigate the changes and challenges of dental development.

With additional years of specialized training after completion of dental school, a pediatric dentist can identify and help prevent treatable problems like baby bottle tooth decay, dental-related speech problems, cavities in the primary teeth, or other factors which may affect the development of the permanent teeth. They can offer advice such as what kinds of liquids are okay before bed, or how to brush a baby’s teeth. Regular pediatric dental checkups also set the stage for great dental health into adulthood.

How Deep Cleaning Enhances Property Value

Deep Cleaning Services

If you want your place to look like new, deep cleaning is the answer. Professionals provide deep cleaning services for clients who want to disinfect and remove all traces of dirt and bacteria in their home or office. There is a difference between deep cleaning and general cleaning. Doing a deep clean is much more thorough and meticulous than doing a general clean. If you want to know how to do a thorough cleaning, keep reading to get some helpful tips to acquaint you with this process.

What is Deep Cleaning?

As discussed above, deep cleaning means sparing no dirt or bacteria while you wipe over all surfaces of your space. Deep cleaning gets rid of all the eyesores in your space like mould, grime, stains and stubborn buildup.

You can also get rid of harmful bacteria when you perform a deep cleaning. Here are some additional benefits:

You get better air quality.

It creates a less stressful environment.

It increases your property value.

You can declutter your space.

How Often Should You Deep Clean?

Deep cleaning may have a lot of benefits, but it’s not something you should do on a daily basis. You can clean with such a high intensity two to three times a year. The most common reasons for putting this extra effort into cleaning include:

Holidays and special occasions.

A special date or visitor.

Preparing the property for viewing when selling it.

Deep clean the house before moving to a new property.

Cleaning up before and after a huge party.

To prepare for a new season, like springtime.

DIY Spring Cleaning Tool Kit

Many people prefer to hire a professional cleaning service. But if professional cleaning is out of the question; you need to prepare all your cleaning supplies first. Materials you’ll need for your one off-house cleaning are as follows:

Bucket, dish soap and warm water

Vacuum and mop

Rags, microfiber cloths and scrubbing sponges

Toilet and grout brushes

Extendable Duster and lint roller

Oven, stainless steel, glass and all-purpose cleaner

Baking Soda, vinegar and lemons

Tile and grout cleaner

Newspaper

Home Chores Every Wife Wishes Her Husband Would Take Care Of

She will love it more than the pretty diamonds and expensive dinners if you share the house cleaning time and everyday chores. At this time and age when both the husband and wife have so many outside commitments, taking care of a house is no longer a woman’s job and it certainly shouldn’t be so. Since both of you are equally invested in turning the bricks and walls into a home, keeping the home neat and clean should be a shared project too. Plus when you are working together for the daily housework, the time required for the job is reduced by half and after all the work you two can find some extra time for play too if you know what I mean.

Making beds in the morning

It’s the first task of the day and a quite important one, because nobody likes to come home to after a long, hard day to a rumpled bed. The woman has other household chores to perform every morning before she leaves for work or puts on the ‘Mom on duty’ cloak. So if the husband takes care of the simple task of making the bed every morning, a big part of her morning duties is reduced.

Deep clean the house

Because cleanliness is next to godliness, husbands. It takes a lot of time and energy to keep the house squeaky clean. We still make peace with the fact the husbands don’t do the regular dusting and cleaning but helping us maintain the basic cleanliness and participating in the monthly deep cleaning of the house makes our housework load a lot less and our love for you a lot more!

When it is time for packing and moving

Join in proactively with the planning and implementation of the huge task of packing and moving would be nice.  A little genuine interest and enthusiasm wouldn’t hurt anyone and hey! it’s your home too!

Stop complaining about the dust balls living in the AC!

Even though it doesn’t count as a daily chore, cleaning the debris from the AC is a draining task and it would be nice if the husbands put it on their list.

Spring Cleaning Guide: How to Spring Clean Your Whole House

Spring cleaning is a time-honored tradition with deep cultural, religious, and historical roots. Whether you and your household personally subscribe to the beliefs and practices that underpin this centuries-old tradition, your drive to spring clean taps into a time-tested, passed-down custom.

Spring cleaning also ties back to the history of keeping winter houses warm and lit with fires and kerosene. These methods filled houses with soot and grime that was an inevitability as people stayed shut in against the cold winter, but that eventually (needless to say) had to be cleaned. Warm weather and longer days meant being able to stop generating all that soot and that windows could be opened to air out the house as residents scrubbed all that literal darkness away.

These days, the practice of spring cleaning is so ingrained in our heritage that even if we don’t follow the practice because of a long winter of burning coal, we feel that pull to throw open our windows and remove all the long-settled dust and dirt from our home environments. As we welcome warmer days and the golden rays of sun that tease buds from barren branches, we want a new start, too. Spring cleaning gives it to us.

Why is Spring Cleaning Important?

Spring cleaning is a chance to reset everything in your home. It’s a chance to catch up on all the cleaning tasks you’ve been meaning to get to or to do the ones that niggle at you. Instead of laying awake wondering when you last cleaned your mattress, for instance, spring cleaning is the nudge you need to get it done and get the idea out of your head. In addition, deep cleaning once a year staves off bigger problems, like a mold takeover of your grout. You can clear dust and grime from areas that hardly ever see the nozzle of a vacuum cleaner attachment. By the time spring cleaning is finished, your home will feel so fresh and clean—a state of habitation that will serve you well, both in mind and body.

Spring cleaning is also a good opportunity to make sure that certain maintenance chores that only need to be done once or a few times a year get checked off the list. When these types of tasks are tied to spring cleaning, it’s more likely you remember to do them. Some of these tasks make a big difference in the longevity, usefulness, and look of your home, such as polishing and sealing granite. Others, such as cleaning out your dryer, are a safety issue.

Spring Cleaning Tips for Music Collectors – A Guide to Deep-Cleaning Vinyl Records

Spring cleaning isn’t just for the home. If you want to keep your vinyl records in flawless working condition, you’ll want to give them the VIP cleaning treatment as well. If you can’t remember the last time you removed the dust and dirt from your favorite record (or your favorite Panic! at the Disco record, if that’s more your style), now is the time to break out the cleaning supplies. Luckily, deep-cleaning vinyl records is easy and takes very little time, and it can keep your favorite LPs spinning flawlessly for years to come.

Remove the Dust and Static

Before we get into the finer points of deep-cleaning vinyl records, we need to remove the surface dust and debris. Some people make the mistake of using washcloths or even paper towels, but if you’re not careful, these items can scratch the surface of the record, leaving you with a much bigger problem on your hands.

To safely complete this step, you can use an anti-static vinyl record brush that removes dust on contact. Just place the brush gently across the surface of the record and allow the turntable to spin a few times.

Apply a Record-Cleaning Solution

Maintaining vinyl records to perfection requires more than just a dusting. Over time, vinyl collects fingerprints, dirt, oils, and an assortment of mystery smudges. These blemishes can impact the performance of your vinyl, so it’s important to get rid of them on a regular basis. This will require a vinyl cleaning solution.

Some people spot-clean their records using their cleanser of choice. There are a few problems with this approach. First, it doesn’t provide a thorough cleaning, as some blemishes are hard to see. More importantly, it exposes the vinyl to excess moisture, which can cause long-term damage.

The Ultimate House-Cleaning Guide

Many of us consider cleaning the house to be a tedious and unwelcome chore, but it doesn’t have to be that way. If you plan ahead and perform routine maintenance, your house can be camera-ready any day of the year. More than that, you’ll enjoy the peace of mind that comes from living in a tidy, well-maintained space. With the help of this comprehensive guide, your home will be spick-and-span

A Step-By-Step Guide To House-Cleaning

No matter what the task, you’ll find it more manageable if you start with a good plan. House cleaning is no exception—in fact, a plan can motivate you to do an even more thorough job. And every plan should begin with a detailed list. Here’s our contribution.

Determine How Much Time You Have.

Many people think they need to devote an entire day to cleaning the house. That’s not true, especially if you follow the advice detailed in “How to Maintain a Clean Home,” below. That said, you’ll probably need to block out a few hours if you want to do a thorough job. If you don’t have that kind of time, that’s okay—just focus on the areas that concern you the most. For your convenience, we’ve also included a section labeled “Tips on Fast, Easy Cleaning,” located near the bottom of this article.

Look At The Big Picture.

If you do have time to perform a thorough cleaning, don’t be tempted to section off different areas of the house. You might be tempted to call it a day after just a couple of rooms. Instead, focus on one task at a time, going through the entire house before starting on a different track. This will give you more exercise and variety, and help to keep you motivated.

Make A Checklist.

Your list will give you something to turn to when you’re feeling overwhelmed and unsure of what to do next. We’ve devoted an entire section to this in “Your Cleaning Checklist,” below.

Reasons Why Bat Removal Is Only For Trained Professionals

Bats in the Attic

This is an educational guide to assist you if you have a bat problem in your home or building and want to get rid of bats in the attic. It is written by a professional bat removal expert who has performed over 500 bat removal jobs, in every type of building, with a 100% success rate, and without ever killing a bat.

First off, I have to say that if you know what you are doing, you can solve your bat problem permanently. But it is not an easy task, especially if you are not experienced. I trained with an expert for two years, got my Bat Conservation International certification, and even then I required many jobs on my own before I truly got good at bat removal from attics and buildings.

Second, I want to make it clear that the and only legal, the only humane, and by far the most effective, way to remove bats from an attic is with a live exclusion. None of the bats are killed in the process.

Above are some photos I’ve taken at various bat jobs. On the left, you can see a group of bats swirling inside a house. In the middle, is a huge swarm of bats, over 1000, entering and exiting a hotel 8 stories up. On the right is a photo inside an attic with a large bat infestation.

Inspection: You have to find out how the bats are getting in and out of the building, where they are living, what species they are, and what damage they have caused. They fly out at dusk, and fly back at dawn. Not all at once, and they make several trips in and out per night. They usually roost in tight, hot areas in the structure. This means that they often roost in attics. However, they are not out in the open. They usually crawl down walls and wedge into gaps behind wood beams, fascia boards, etc. They can leave millions of droppings (guano) all over your attic. The exact species of bat is very important in performing the exclusion properly, because of different sizes, behaviors, and most of all birthing seasons.

Bats in the roof

Control

Many bats are endangered or threatened, so both UK and European legislation gives them very full protection. It is illegal to intentionally kill, injure or take any bat or to recklessly damage, destroy or block up their roosts or disturb them. Because bats tend to return to the same roosts each year, these sites are protected whether the bats are present or not. Therefore the council is unable to offer any pest control services for bats.

Bats in roofs

The 16 species of British bats are all small harmless mammals which feed only on insects. During the day, bats use a variety of places, including house roofs, for roosting and they form colonies at some times of the year. Bats do not damage property and there is no known health risk associated with them

In dwelling-houses that are used by bats, the legislation allows building maintenance or remedial operations to be carried out. However, Natural England must have been notified in advance and allowed time to advise on whether the operation should be carried out and, if so, the method and timing of the work

Where structural, demolition or conversion work is proposed to buildings that are not dwellings (e.g. churches and barns) it is necessary to consult the Department for Environment Food and Rural Affairs (DEFRA) about licensing implications before any work can proceed.

This explanation should be regarded only as a guide to the law, and the Wildlife and Countryside Act 1981 (as amended) or the Conservation (Natural Habitats etc.) Regulations 1994 should be consulted if in doubt. Many species of bat are dependent on buildings for roosting, though they may not be present throughout the year

How to Get a Bat Out of Your House

So you have a bat in your belfry, huh? Wanting to get rid of it is understandable. Sure, there are benefits to having bats around; they eat pesky mosquitoes, moths and beetles, for example. But their droppings can make quite a mess, and if they get into your living space, you run the risk of someone being bitten.

Most of the time, bats end up in your home accidentally. They may chase an insect through an open window, or they may get confused while finding their way in the dark. If one is resting on the outside of your house and gets startled, it may dart in through an opening

Encouraging an exit

Never try to catch a flying bat, says the Bat Conservation Trust. Doing so could injure the bat, or it could bite you in self-defense. Instead, encourage the bat to leave on its own or wait until it lands to catch it.

To help the bat find its way out, first remove all pets and children from the room, then close all doors to the room, open the windows as wide as possible and dim the lights. Turn off any outside lights near the exits. Then quietly wait for it to show itself out.

To make sure it has flown out, check high spaces, such as in curtain folds or behind wall decorations, the Bat Conservation Trust advises. But also check low spaces, because if the bat is injured, it may have flown down to hide.

How To Get Bats Out of Your Attic

Bats are removed from the attic with a live exclusion. This is the best way. It is the most effective, and the only legal way, as well. A live exclusion means that you install a one-way door or one-way netting devices which allow the bats to exit the building freely, as they do each night, but then not get back inside. It’s a simple concept, but it’s difficult to execute effectively

Bat removal can be a complex task, because the bats can enter a building through very small cracks – as small as 1/4″ – it’s amazing! They almost seem to disappear into nothing! The holes and gaps that bats use are usually located high on a building, at roof lines, and can be tricky to access. A bat removal job requires utmost attention to detail

It also requires adherence to state laws protecting bats. For example, never perform a bat exclusion during the summer, because of the flightless baby bat pups in the attic! I myself trained in bat removal for two years, and still needed a fair amount of practice to perform bat removal correctly. Our network of wildlife removal professionals on this site are excellent in bat control

Information About Bats in the Attic

Are there baby bats? Yes, that’s the reason bats enter the attic. These bats can live in very large groups, called maternity colonies. The bats in your attic are all females. They give birth to one pup each, usually in the month of May, but it can vary depending on species or local climate. The pups in the attic are flightless during the summer months, while the females nurse them. This is called the maternity season, and you absolutely cannot perform a bat exclusion during this time, because you will trap the young baby bats inside! It’s illegal, and a terrible event, because the baby bats start to crawl around and they often get inside the house, or they starve and die and rot and cause a bit odor problem.

What species of bats are in my attic? The United States is home to three common species of colonizing bats: The Little Brown Bat, the Big Brown Bat, and the Mexican Free-Tail Bat. There are some other colonizing species of bats that choose to roost in attics, but those are the major three. You can identify them by entering the attic and spotting them, although to be honest, this can be very hard – they don’t just hang from the ceiling or raftors. They clump up in tight packs under gaps, behind beams, down walls, and areas like that. Hundreds of bats can cram into very tight quarters. You can also identify them by observing them fly out. If you live in the south, it’s more likely to be Freetail bats, and in the north, the big brown or the little brown, which you can identify by size and size of droppings. It’s important to know the species, so you can tell the bat birthing season.

Rid Your Attic of Bats

So, have you just bought a new house in the countryside? Maybe it is not new; actually, let’s face it, if those walls could talk… Still, that is part of its charm! In the end, what is better than a lovely rustic place of your own away from traffic jams, pollution and noisy cars? Yes, you finally have that place to get away from it all! Whether it is for a few weekends every month, or to send your children away from the pollution, stress and, let’s be honest, even the dangers of city life during the summer months, you now have a place you can call your home to go to… Set in the best surroundings you could possibly find, maybe surrounded by wild fields and forests, rivers and mountains, that lovely place of yours has been empty for some time, but that is the place your heart wants to call home… Perhaps you are even considering retiring to this beautiful spot in the country when you are older, or when you can afford it? Great

Maybe you have decided to live in the countryside, as some friends of mine have done, to grow up your children? You have left the city and, having found that beautiful cottage, farm, or old house, you have invested all your savings and are ready to make the big step and move in? Let me tell you that I am really happy for your choice; I understand it and support it wholeheartedly.

So you are looking forward to a bucolic life surrounded by green trees, wild prairies, birds and butterflies? Many days of joy will be coming to you in the year to come… However as you actually move in, or start inhabiting the place, you notice something you had not spotted at all when you first visited the place during the day… Yes, because when you spend your first night in your new home, your attention is caught by some unusual movements and sounds above your head. “Well, I don’t mind,” you think at first, “there must be some birds on the roof; they will soon go…” But days go by and the little sounds (not chirps, you realise) continue, so does the nigh time activity… So, you decide to take the ladder and have a look at who dwells in your attic.

Bats are not usually aggressive to humans (with some exceptions, like Vampire Bats, who live in South and Central America, who have been known to attack people even if very rarely). So, forgetting horror movies like Dracula and the like, you will not likely be under direct attack by these little nocturnal animals.

However, some bats carry viruses and bacteria that can be dangerous to us. The risk of infection is actually quite low, but if you handle them, it rises significantly. That is why only trained and vaccinated people should catch bats